


- Volvo Penta
- Starter motors Volvo Penta
- Sensors Volvo Penta
- Valve covers – oil sumps Volvo Penta
- Wiring harnesses Volvo Penta
- Gearboxes – saildrives Volvo Penta
- Fuel systems Volvo Penta
- Instrument panels Volvo Penta
- Pistons – connecting rods Volvo Penta
- Cooling water system Volvo Penta
- Crankshafts – camshafts Volvo Penta
- Flywheels – flywheel housings Volvo Penta
- Cylinder heads Volvo Penta
- Heat exchangers and aftercoolers Volvo Penta
- Alternators Volvo Penta
- Control units / EVC / MDI Volvo Penta
- Exhaust systems Volvo Penta
- Engine lubrication system Volvo Penta
- Aftermarket Volvo Penta
- Saildrives Volvo Penta
- Engine mounts Volvo Penta
- Vetus
- Yanmar
- Ellebogen
How to Replace a Volvo Penta Saildrive Bellow: DIY
What You’ll Need:
- Basic Tools: Socket set, screwdrivers, Allen key set.
- Materials: Loctite, Saildrive bellow kit (OEM or high-quality aftermarket).
- Support: Wooden blocks, a jack, or other support for under the engine.
Step-by-Step DIY Guide to Replacing a Volvo Penta Saildrive Bellow

Drain the oil from the Saildrive.
Unscrew the dipstick on the top of the Saildrive to allow the oil to flow out faster.
Assess whether the Saildrive can be removed with the lower shaft intact.
If not:
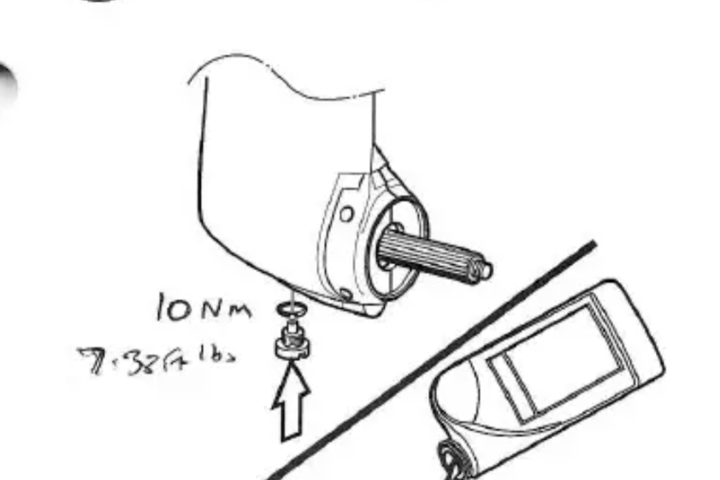
Remove the shaft from the housing by first removing the anode.
Then, unscrew the two Allen bolts from the bearing housing.
Gently tap the bearing housing back and forth to create some space.
Use a screwdriver to carefully pry it forward without excessive force.

Detach the exhaust hose and set it aside. Do the same for other cables and hoses that might obstruct the removal of the Saildrive.
Check if your cables are long enough to allow the engine to move forward by a few centimeters.
If not:
Disconnect any cables or hoses that are too short to provide the necessary clearance.
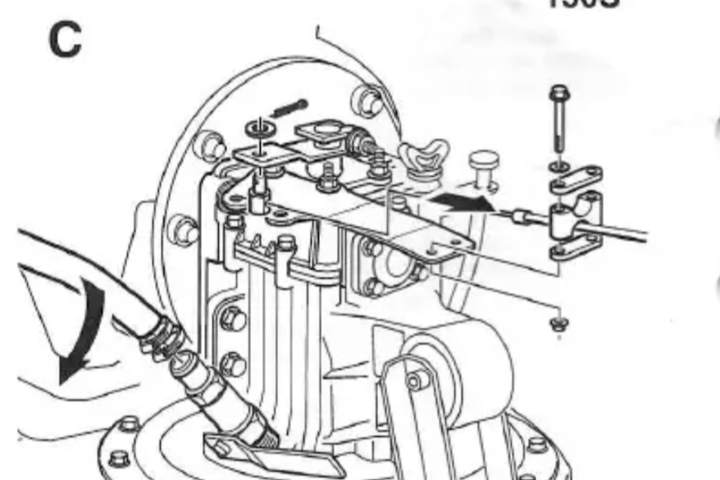
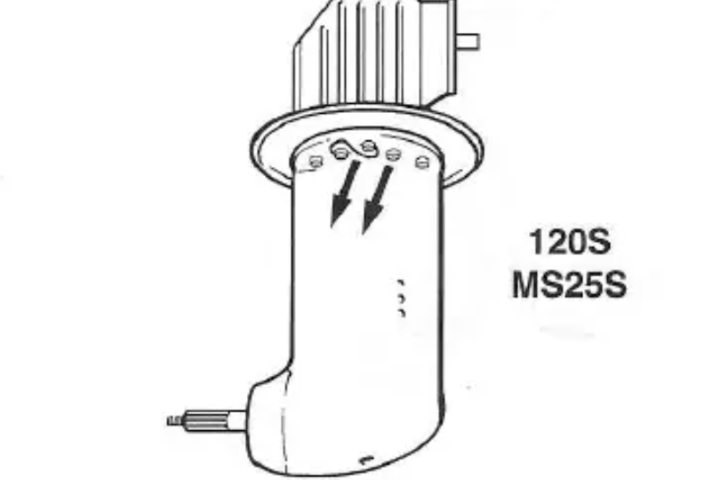
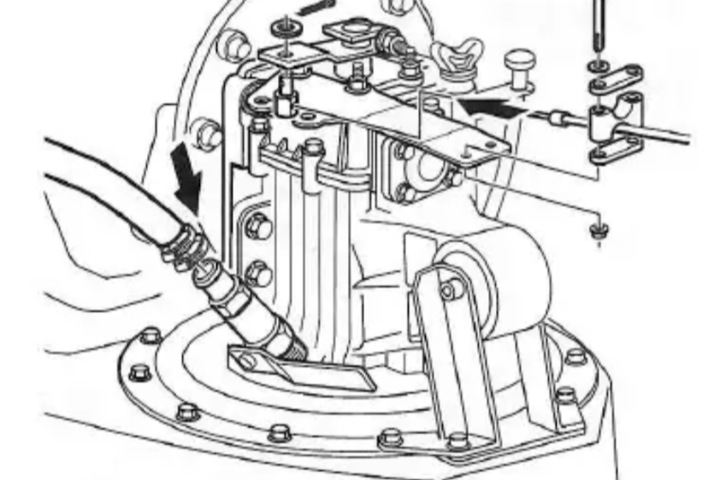
Refer to the provided diagrams for guidance: one for the MS25, 130S, 150S, and another for the 120S, 110S.
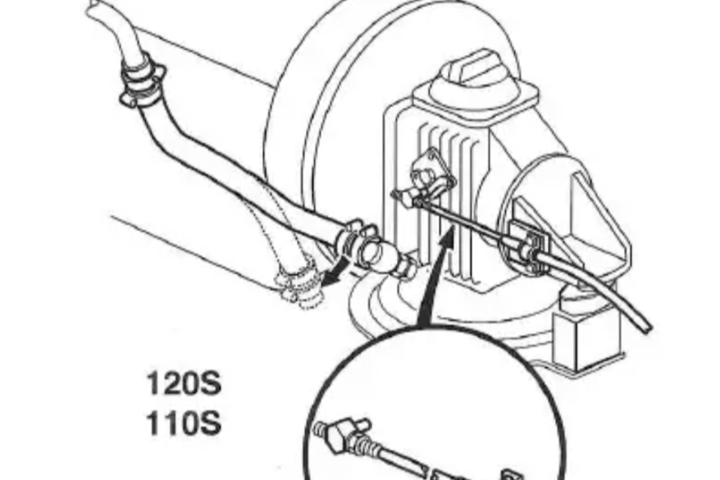
Disconnect the shift cables and cooling water hose as shown in the images for your specific Saildrive model.
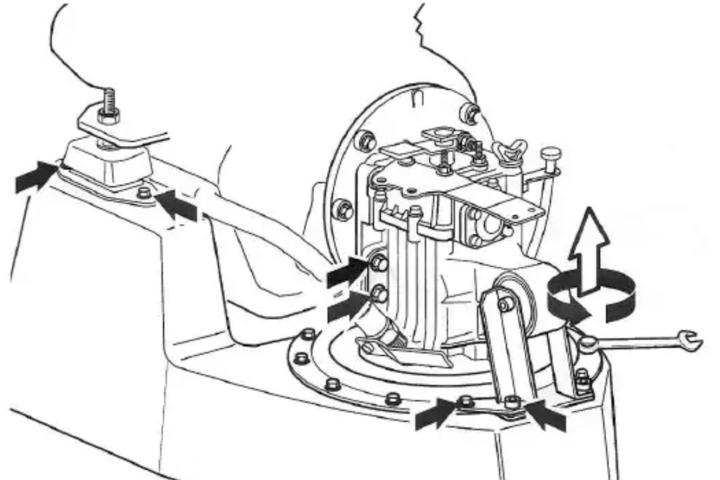
Loosen the engine mounts and unbolt the Saildrive.
From experience, it’s best to first remove the bolts that secure the Saildrive to the engine, while leaving the flange bolts (that attach the Saildrive to its bed) in place for stability during the initial steps.

Support your engine with wooden blocks, a jack, or other filling material to provide a stable resting point.
Move the engine forward as far as possible. The more space you create, the easier the rest of the process will be.
Now, unscrew the bolts that were indicated in Step 4. Once they are removed, you can lift the Saildrive upwards. It is easiest to do this with two people to ensure proper handling and safety.
Undo the bolts!
Step 8A:
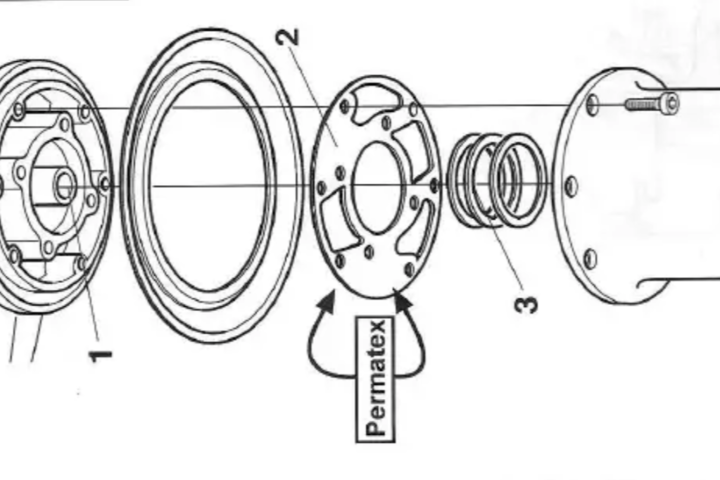
For the 110S and 120S-A:
Once the bolts are removed from the tailpiece, you can remove the tail section. At this point, you can also remove the bellow.
Be careful not to lose the three shims.
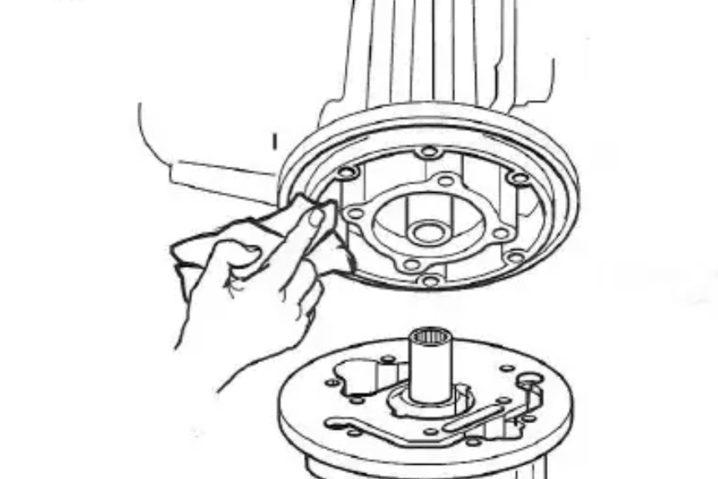
Clean the surface for the gasket and bellow thoroughly.
Assembly:
Install the gasket as it was originally, without reversing it.
Use Permatex when installing the gasket.
Mount the bellow with the year code facing the Saildrive’s seal.
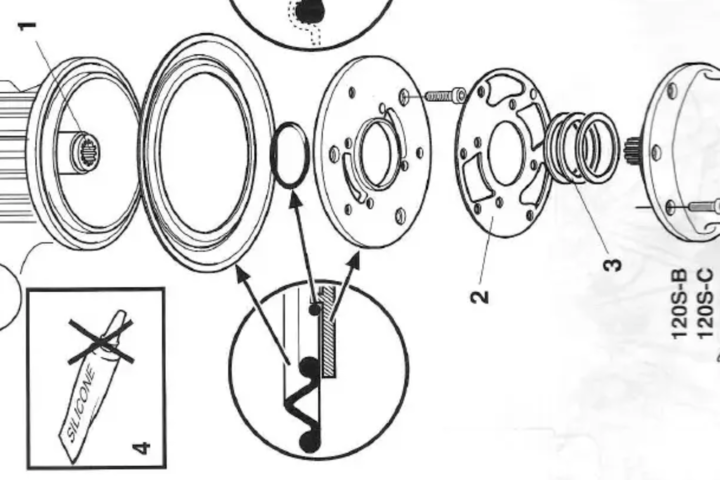
Step 8B:
For the 120S-B, 120S-C, 120S-D & MS25:
After removing the tailpiece, unscrew the two Allen bolts and remove the intermediate plate.
Take note of how everything is disassembled, as it must be reassembled in the exact same way with the new materials from the kit.
Clean the surface for the gasket and bellow thoroughly.
Install the gasket as it was originally, without reversing it.
Do not use Permatex or similar products.
Mount the bellow with the year code facing the Saildrive’s seal.
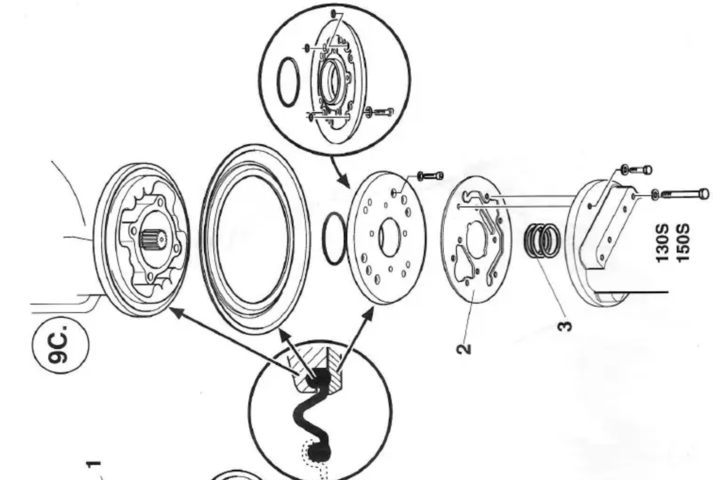
Step 9C:
For the 130S & 150S:
After removing the tailpiece, unscrew the two Allen bolts and remove the intermediate plate.
Note the disassembly order to ensure everything is reassembled correctly with the new kit materials.
Clean the surface for the gasket and bellow thoroughly.
Install the gasket as it was originally, without reversing it.
Do not use Permatex or similar products.
Mount the bellow with the year code facing the Saildrive’s seal.
Reassemble everything. Pay close attention to how the gasket and O-rings were originally placed and reinstall them in the exact same orientation, ensuring they are not reversed.
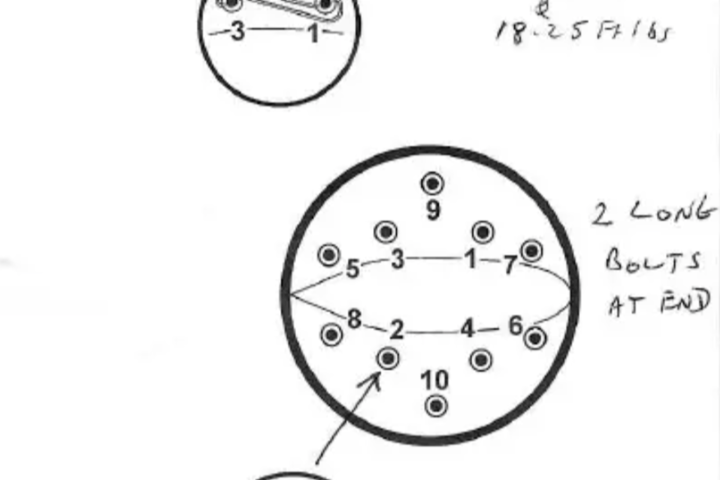
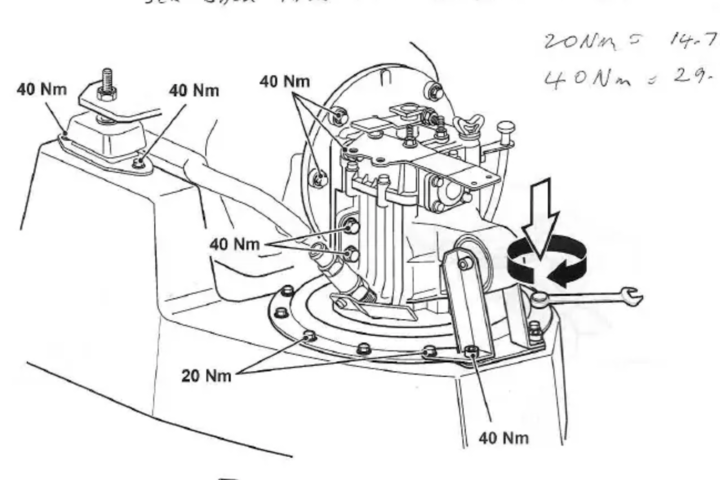
Here’s the order for tightening the bolts:
It’s actually quite simple—tighten the bolts from the inside out.
If you haven’t already reinstalled the Saildrive plate, do so now. You can easily position it around the tail and slide it back into place.
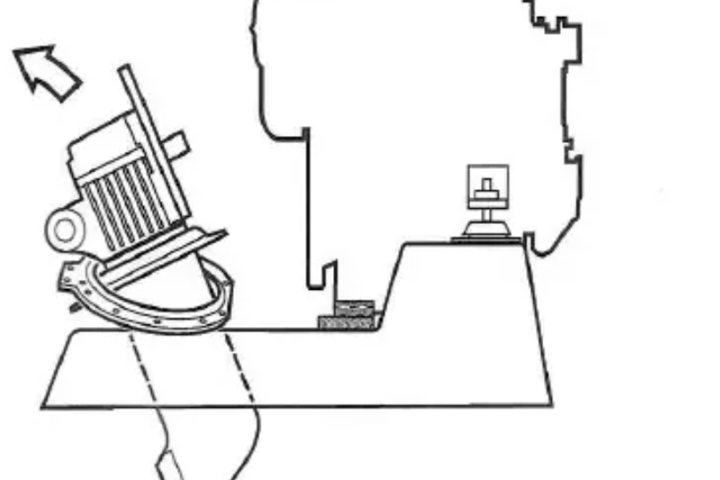
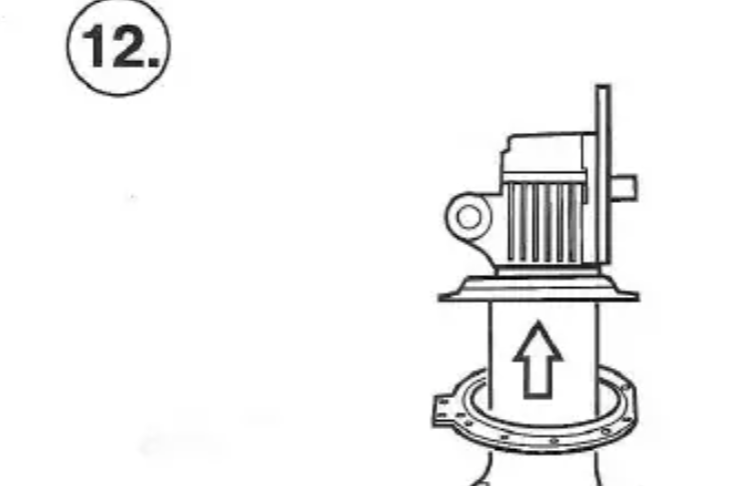
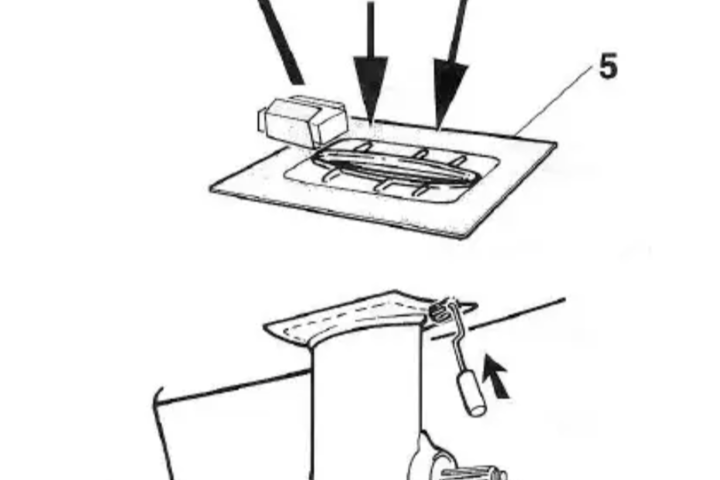
Place the Saildrive back into the hole from which it was removed. Ensure it is properly aligned and securely positioned.
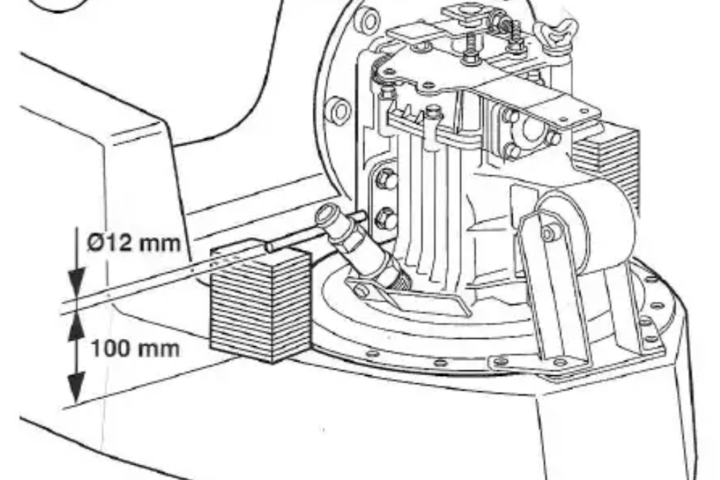
In the image, a setup is shown to help align the holes when reinstalling the Saildrive. This is because it can be tricky with the Volvo Penta Saildrive to line up the holes correctly, causing the bellow to slip.
Alternatively, with two people, one can stand under the boat to lift and hold the Saildrive in place, while the other tightens the bolts.
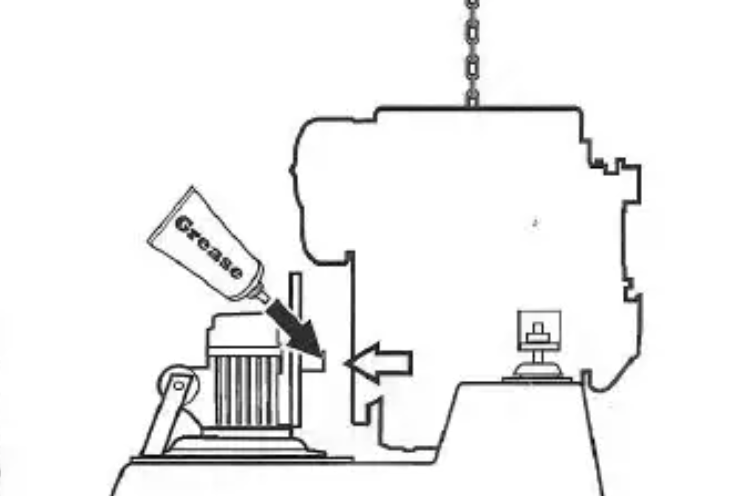
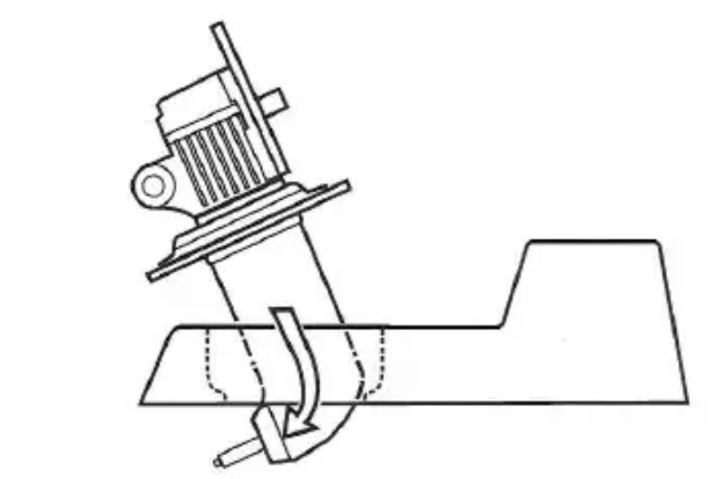
Once the Saildrive is securely in place, apply some grease to the shaft of the Saildrive to ensure smooth operation and prevent wear.
Slide the engine back into position. Rotate the crankshaft back and forth to ensure the Saildrive aligns properly with the damper plate’s splines. This may require some patience.
Once aligned, tighten all the bolts securely.
Reinstall all shift cables, electrical cables, cooling water hoses, and exhaust hoses. Ensure everything is securely connected and properly aligned.
Reinstall the shaft or just the drain plug.
If you removed the shaft, it’s advisable to replace the seals in and around the bearing housing. Inspect the shaft for wear, especially around the seals, to ensure there are no signs of damage or excessive wear.

Fill your Saildrive with the correct oil! Make sure to use the appropriate type and quantity as specified in the manufacturer’s guidelines to ensure proper operation and lubrication.
Reinstall the final rubber part if you removed it or if it is in poor condition.
Congratulations, you have successfully replaced your Saildrive bellow!
FAQs:
How often should the Saildrive bellow be replaced?
It’s recommended to replace it every 7 years or after about 500 running hours, whichever comes first.
Can I replace the bellow myself?
Yes, with the right tools and technical knowledge, you can replace it yourself. Follow the instructions carefully and proceed cautiously.
Symptoms of a worn bellow?
Water in the motor compartment and potential corrosion around the motor.
For more information, check the manufacturer’s guidelines.
Get your saildrive parts here
-

Bellow Kit Volvo Penta Saildrive 110S, 120S, 130S, 150S, MS25| 854934 – 21389074 (aftermarket)
€171.95 -
Volvo Penta manchet / bellow kit saildrive 21389074
€395.00 -
Seal Volvo 3593663 saildrive ( 851979, 873108)
€45.75 -
Volvo Penta Seals and O-rings Set 120S-E, MS25S-A, MS25R-A (Output Shaft)
€39.99 -
Volvo Penta Seals and O-rings Set 130S, 150S (Output Shaft)
€54.50

")

")